Introduction
Magento is a feature-rich eCommerce platform built on open-source technology that provides online merchants with unprecedented flexibility and control over the look, content and functionality of their eCommerce store. It comes with a variety of tools, necessary for building a successful online shop.
A new bridge between Tryton and Magento has been initiated by Openlabs team. This module allows synchronization of Magento with Tryton. It supports Synchronization of Customers, Addresses, Product Categories, Products, Order Status, and Orders.
This tutorial will guide you through installation, setup and configuring magento integration module. To start with this see Installation first.
Installation
Install Trytond Magento integration module by following the listed steps. Continue reading to know more.
Installation of Magento Core API extension
The steps which you must follow in order to complete the Trytond Magento Integration installation are:
Step 1: Installation of Magento core API extension
- Log in to Magento Admin Area:
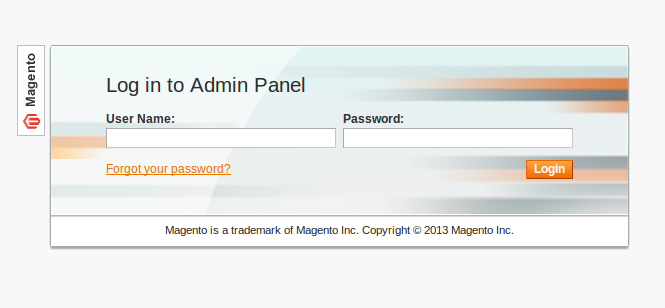
- After login to magento Admin Panel,
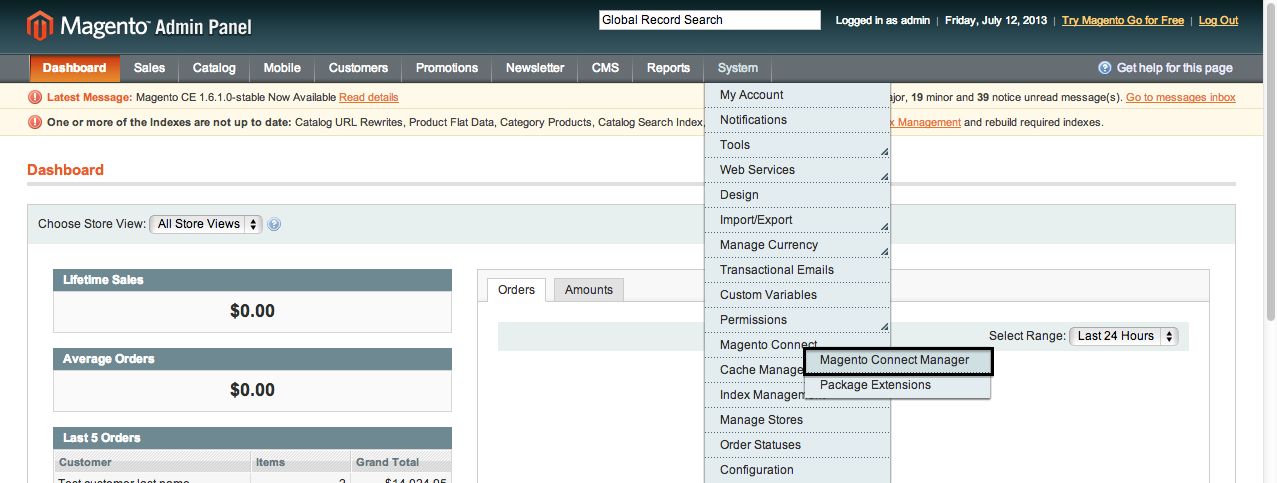
Now go to System >> Magento Connect >> Magento Connect Manager , click it
and you will be taken to a login page, The Magento Connect Manager section
allows you to edit settings for installation:
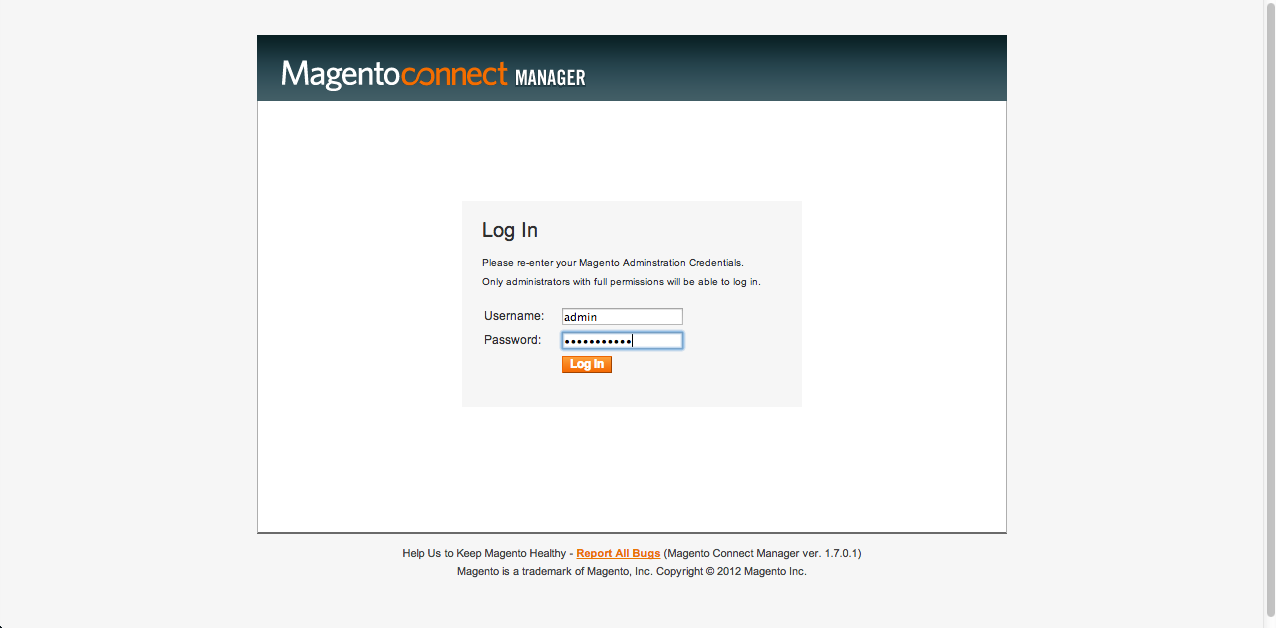
A new page will open for the Magento Connect Manager and you will be asked to provide your administrative credentials again. Key in your username and password, the same username and password you entered while login to magento:
Once logged in you will see 2 sections: Extensions and Settings. It is recommended to verify the options chosen in the Settings section first. Click on the
Settingstab and change preferred state to ‘Beta’. (As of this date the plug-in is beta). Save your settings: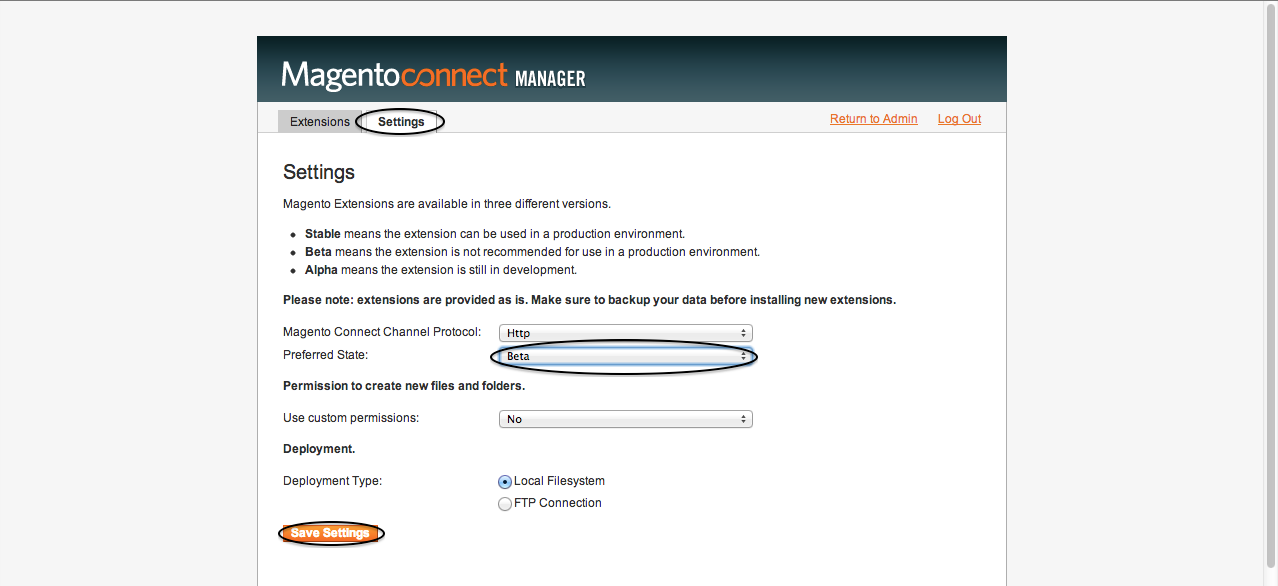
Note
Default state is Stable, change it to Beta.
Go to the first tab i.e.,
Extensionsto install magento-connector,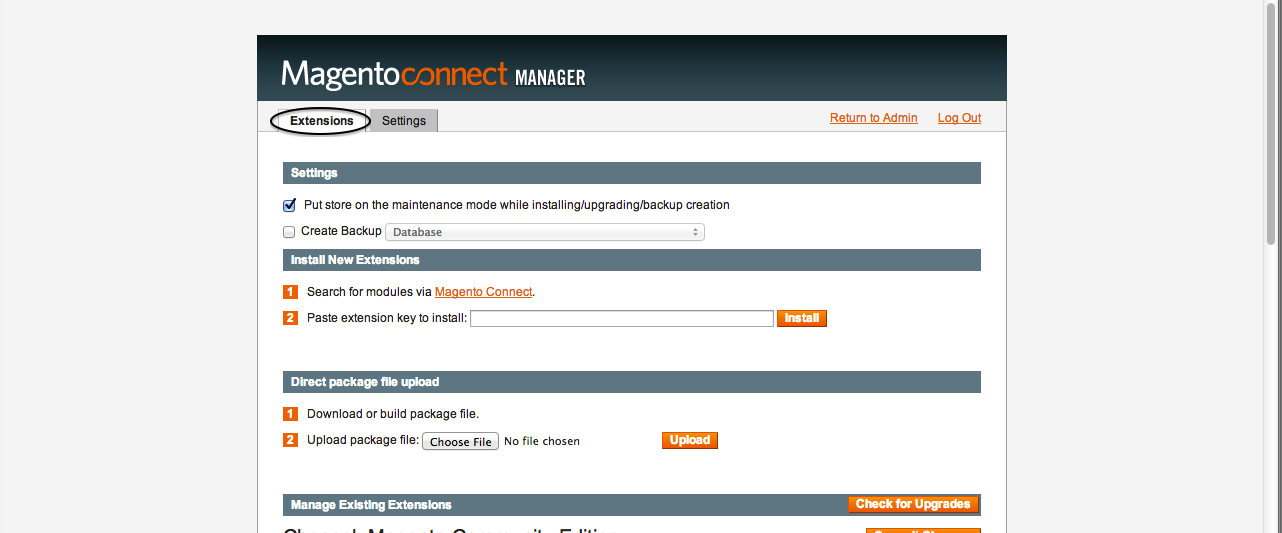
The following is the extension key that you need to copy and paste in your Magento Connect area; it will be used for installing the magento-connector:
http://connect20.magentocommerce.com/community/Openlabs_OpenERPConnector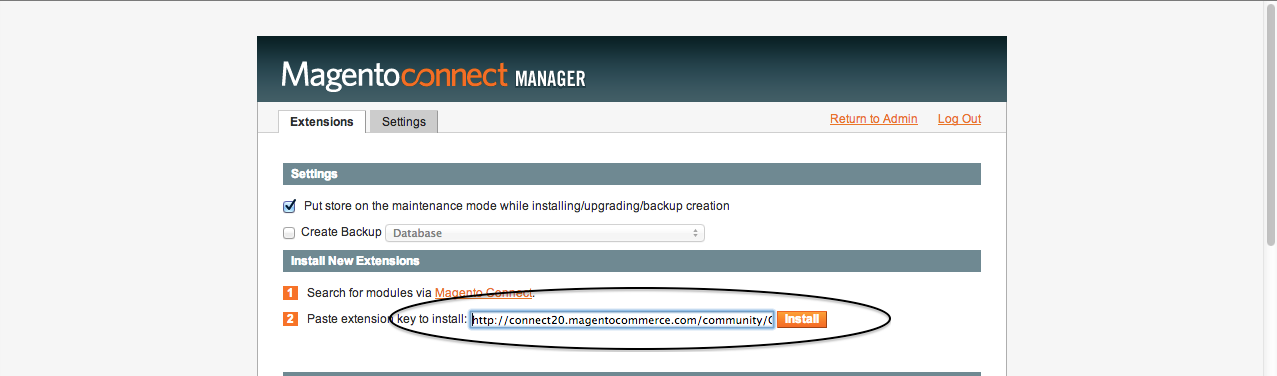
Once you have chosen an extension key, click Install, and wait for the module to appear for installation with Magento Connect version matching your current Magento version:

Install it by clicking
Proceed, refer below screenshot: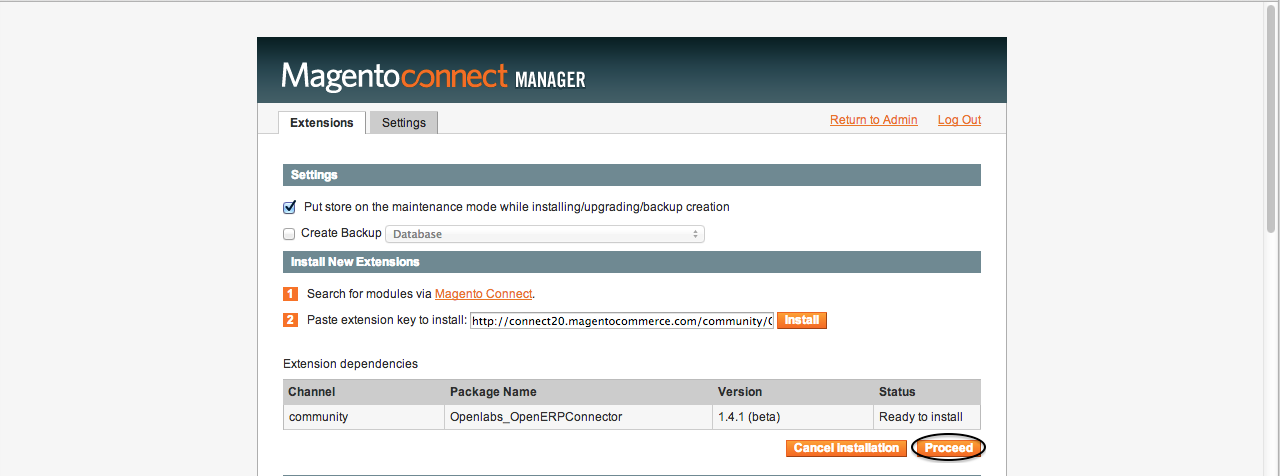
The new extension will be automatically downloaded and installed. If there is a problem with the installation, there will be information about it so that you know what should be done to resolve it. After the extension is properly installed a screen for a successful installation will appear:

To check the installed module, go to bottom of your page as it is located at the end of the list, see below:

Installation of Magento Integration [Tryton module]
Step 2: Installation of Magento Integration [Tryton module]
Downloading the module
The module source is available online and can be downloaded from here.
The module can be downloaded as a zip file or can be cloned by running
$ git clone https://github.com/openlabs/trytond-magento.gitOR
$ git clone git@github.com:openlabs/trytond-magento.gitIf the module is downloaded as a zip file, extract the module which will give a directory.
From the module directory, use the setup.py script with the command:
$ python setup.py install
Installing the module in Tryton database
Run Trytond Server
$ trytond -c <path-to-trytond-configuration-file>
Run Tryton client
$ trytonThis will display a login window
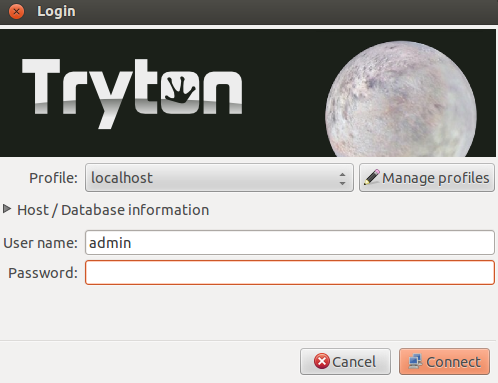
Close this window and go to
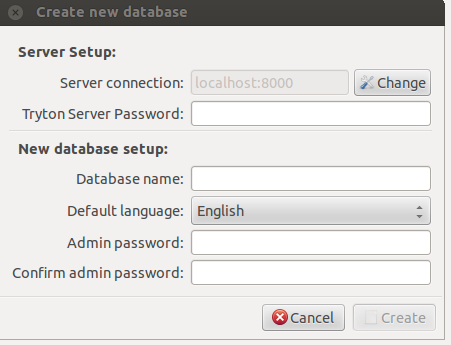
File >> Database >> New Databaseto create database for trytond magento connector.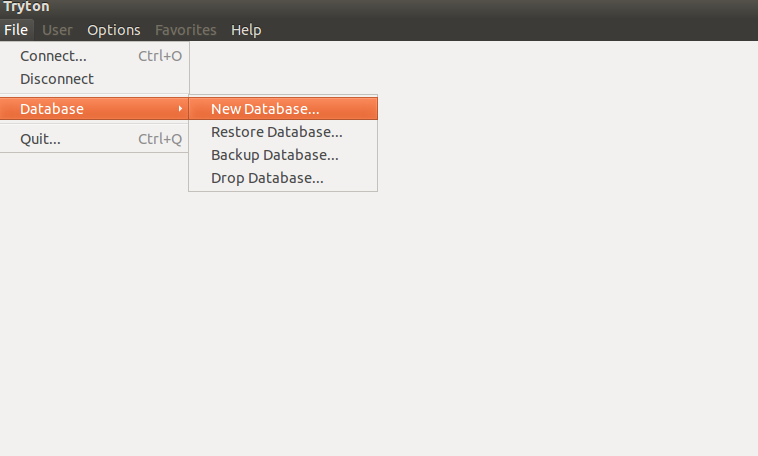
It will open a window, which will prompt you to fill the database details.
Login to Tryton
Now login with created database and configure tryton using configuration wizard displayed.
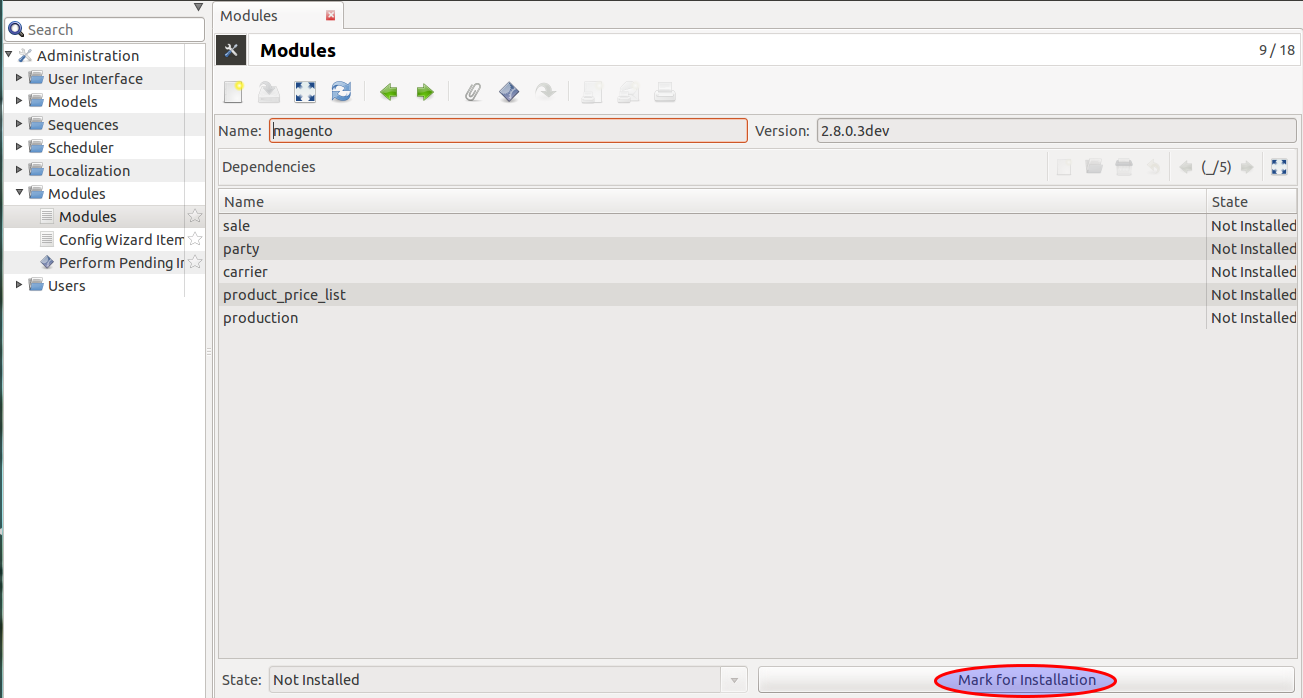
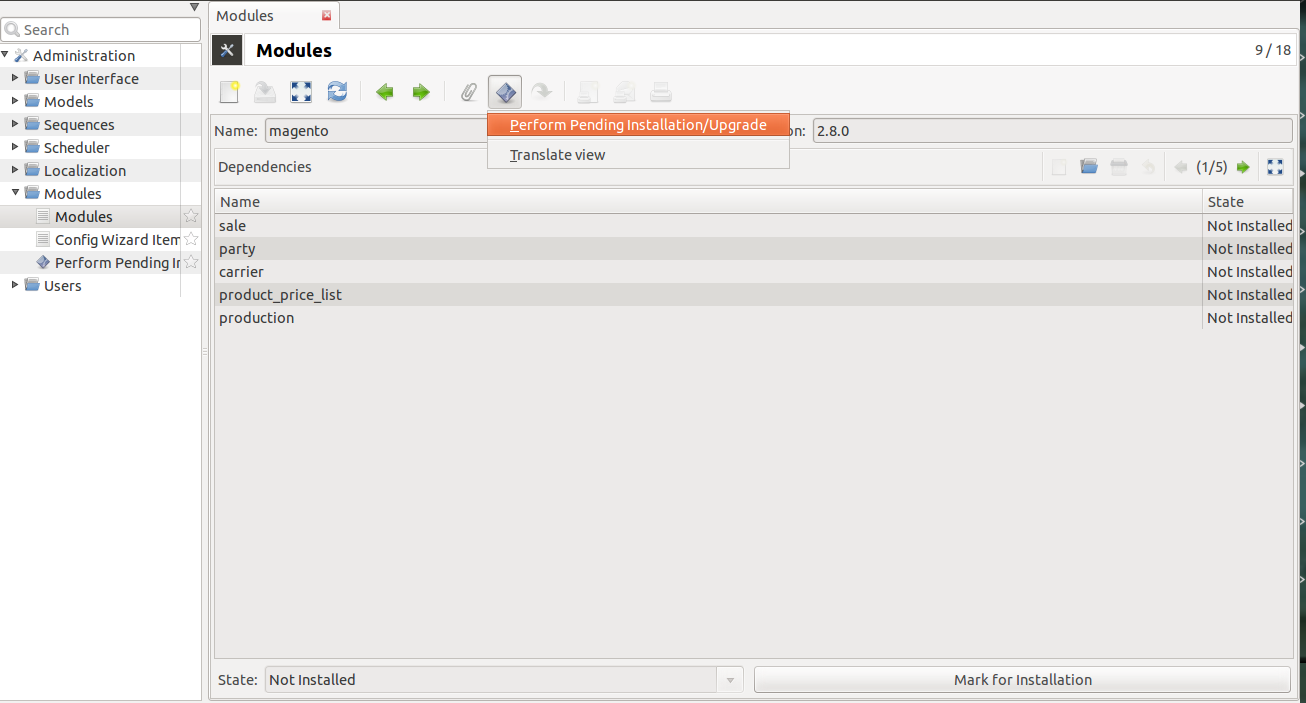
Now go to Administration >> Modules and click on Modules that will open
list of all modules installed.

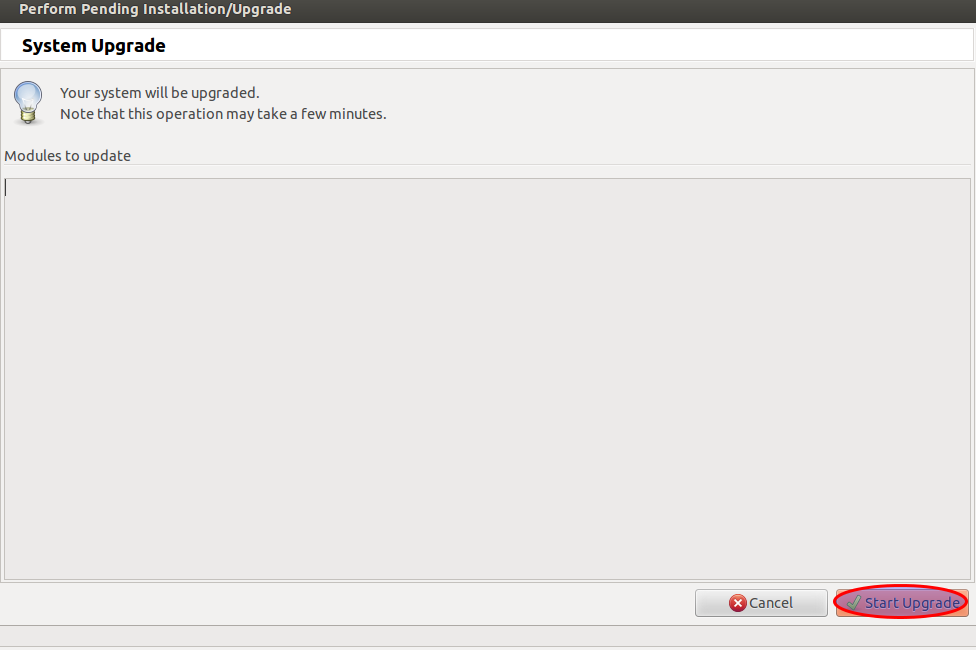
Now Click on the Magento module, mark for installation and perform pending installation/upgrade as shown below:
Clicking the icon shown above will open a wizard to start upgradation. Click on Start Upgrade as shown below and the module is ready to use.